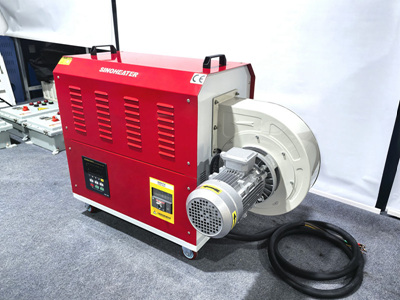
Repairing Heat Blower Issues After Use in Humid Environments
Exposure to high humidity can cause corrosion, electrical shorts, and component failure in heat blowers. Identifying and addressing moisture-related damage promptly prevents further deterioration. Below are detailed steps to diagnose and fix common post-humidity-exposure problems.
1. Recognizing Moisture-Induced Heat Blower Failures
Understanding symptoms of water damage helps prioritize repairs.
- Electrical Malfunctions: The unit may fail to power on, cycle on/off randomly, or display error codes. Humidity can corrode connections or short circuit components, disrupting electrical flow.
- Unusual Odors or Smoke: A musty or burning smell after use in humid conditions may indicate moisture trapped in the motor, heating element, or wiring. Smoke suggests severe overheating or short-circuiting.
- Reduced Airflow or Heat Output: Moisture can cause the fan motor to struggle or the heating element to corrode, resulting in weak airflow or lukewarm heat.
2. Initial Safety and Inspection Steps
Ensure safety and assess the extent of moisture damage before repairs.
- Unplug and Disassemble: Immediately unplug the heat blower and allow it to cool completely. Remove housing panels to access internal components. Avoid using the unit until repairs are complete to prevent electric shock or fire hazards.
- Inspect for Visible Water Damage: Look for rust, corrosion, or water stains on the motor, circuit board, wiring, and heating element. Pay close attention to areas near vents or seams where moisture may have entered.
- Check for Standing Water: If the unit was submerged or drenched, gently tilt it to drain any trapped water. Use a dry cloth to absorb moisture from surfaces, but avoid wiping electrical components directly.
3. Drying and Cleaning Internal Components
Remove moisture and debris to prevent corrosion and short circuits.
- Use Compressed Air or a Vacuum: Blow compressed air into vents, ducts, and crevices to dislodge water droplets and dust. Alternatively, use a vacuum with a brush attachment to gently suck up moisture. Avoid high-pressure air, which can force water deeper into components.
- Wipe Components with a Dry Cloth: Gently wipe the motor, fan blades, heating element, and circuit board with a lint-free cloth. Do not use water or cleaning solutions, as they may exacerbate damage.
- Apply Desiccant Packs (Optional): Place the disassembled unit in a sealed container with silica gel or rice for 24–48 hours to absorb residual moisture. This step is most effective for minor water exposure.
4. Testing and Repairing Electrical Components
Address corrosion, shorts, and faulty connections to restore functionality.
- Inspect Wiring and Connectors: Look for frayed wires, burnt insulation, or loose connections. Corroded terminals may appear greenish or pitted. Clean terminals with a wire brush and apply dielectric grease to prevent future oxidation.
- Test the Motor and Heating Element: Use a multimeter to check continuity and resistance. A motor with infinite resistance (open circuit) or erratic readings may need replacement. Similarly, test the heating element for proper continuity—a break indicates failure.
- Check the Circuit Board: Examine the board for burnt components, swollen capacitors, or corroded traces. If the board is severely damaged, professional repair or replacement may be necessary.
5. Reassembling and Testing the Heat Blower
Rebuild the unit carefully and verify repairs.
- Reinstall Components: Securely reattach the motor, fan, heating element, and housing panels. Ensure all wiring is routed correctly and connections are tight.
- Power On the Unit: Plug in the heat blower and turn it on. Monitor for unusual noises, smells, or error codes. Run the unit on a low setting for 10–15 minutes to check for overheating.
- Test Airflow and Heat Output: Use a thermometer to measure the air temperature at the outlet. It should reach the expected range for the selected setting. Weak airflow may indicate a lingering motor or fan issue.
6. Preventing Future Humidity-Related Damage
Adopt measures to protect the heat blower in moist environments.
- Use in Well-Ventilated Areas: Avoid operating the unit in basements, bathrooms, or other damp spaces without proper ventilation. Ensure air can circulate freely around the heat blower.
- Store Properly When Not in Use: Keep the unit in a dry, covered location. If stored long-term, place it in a sealed container with desiccant packs to absorb ambient moisture.
- Schedule Regular Maintenance: Clean air vents, filters, and internal components monthly to prevent dust buildup, which traps moisture and accelerates corrosion.
7. Troubleshooting Persistent Issues After Repair
If problems persist, deeper faults may require professional attention.
- Check for Hidden Water Damage: Moisture may have seeped into sealed components (e.g., capacitors, switches). Disassemble further if needed to inspect hard-to-reach areas.
- Test the Control Board Again: Intermittent issues often stem from a failing control board. Use a multimeter to check voltage outputs and component functionality.
- Consult a Technician: If you’re unsure about diagnosing or repairing the unit, seek help from a qualified professional. They can identify complex problems and ensure safe operation.
8. Addressing Rust and Corrosion on Metal Parts
Prevent long-term damage to metal components exposed to moisture.
- Sand Light Rust: Use fine-grit sandpaper to gently remove surface rust from motor housings, fan blades, or brackets. Wipe the area with a dry cloth afterward to remove debris.
- Apply Anti-Corrosion Spray: Spray a thin layer of rust inhibitor or silicone lubricant on metal parts to protect against future corrosion. Avoid spraying electrical components.
- Replace Severely Corroded Parts: If metal components are pitted, weakened, or unable to move freely (e.g., a seized fan blade), replace them with compatible parts.
By following these steps, users can repair heat blowers damaged by humidity and restore proper function. Prioritize safety during disassembly and testing, and avoid using the unit until repairs are complete. Regular maintenance and proper storage minimize the risk of future moisture-related issues.


