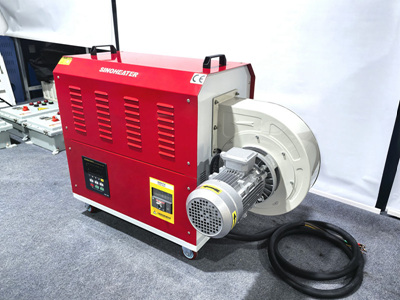
Wind Speed Adjustment Techniques for Hot Air Blowers in Plastic Welding
Plastic welding using hot air blowers is a precise process that requires careful control of wind speed to achieve optimal results. Proper wind speed management not only ensures strong, durable welds but also enhances operational efficiency and material compatibility. Below are key techniques for adjusting wind speed effectively during plastic welding operations.
Understanding the Role of Wind Speed in Plastic Welding
Wind speed directly influences the heating efficiency and temperature distribution during plastic welding. A higher wind speed accelerates heat transfer, allowing for faster melting of the plastic surfaces. However, excessive wind speed can lead to uneven heating, localized overheating, or insufficient penetration of the weld material. Conversely, a low wind speed may result in inadequate heating, leading to weak welds or incomplete fusion.
The optimal wind speed varies depending on the type of plastic being welded, the thickness of the material, and the welding technique employed. For instance, welding thin films of polyvinyl chloride (PVC) typically requires lower wind speeds to prevent distortion, while thicker polyethylene (PE) components may need higher speeds for efficient melting.
Techniques for Adjusting Wind Speed Based on Material Type
Thin Plastic Films (e.g., PVC, HDPE)
When welding thin plastic films, such as those used in roofing membranes or packaging materials, a lower wind speed is recommended. This prevents the material from overheating or warping, which can compromise the weld’s integrity. Start with a wind speed of 2–4 m/s and gradually increase it if the material is not melting uniformly. Use a narrow nozzle to focus the heat on the weld area, minimizing heat loss to surrounding regions.
Thick Plastic Components (e.g., PE, PP)
For thicker plastic components, such as pipes or storage tanks, a higher wind speed is often necessary to ensure sufficient heat penetration. Begin with a wind speed of 5–8 m/s and adjust based on the material’s response. If the edges of the weld are not melting properly, increase the speed slightly. However, avoid exceeding 10 m/s, as this can cause turbulence and uneven heating.
Specialized Plastics (e.g., PVDF, TPO)
Specialized plastics, such as polyvinylidene fluoride (PVDF) or thermoplastic olefins (TPO), may require precise wind speed adjustments due to their unique thermal properties. PVDF, for example, has a high melting point and requires consistent heat input. Start with a moderate wind speed of 4–6 m/s and monitor the weld pool’s formation. For TPO, which is prone to thermal degradation, maintain a lower speed of 3–5 m/s to prevent burning.
Advanced Wind Speed Control for Complex Weld Geometries
Curved or Irregular Surfaces
Welding on curved or irregular surfaces demands dynamic wind speed adjustments. Use a variable-speed blower with manual or automated controls to adapt to changes in the material’s orientation. For instance, when welding a curved pipe, reduce the wind speed at the bends to prevent overheating and increase it on straight sections for efficient melting.
Narrow or Confined Spaces
In narrow or confined spaces, such as the interior of a tank or a tight corner, a lower wind speed is essential to avoid heat buildup and material distortion. Employ a flexible nozzle or a deflector to direct the hot air precisely. Start with a wind speed of 2–3 m/s and increase it incrementally if the weld is not progressing smoothly.
Multi-Layer Welding
When welding multi-layer plastic assemblies, such as those found in automotive components or industrial linings, a staggered wind speed approach works best. Begin with a lower speed (3–5 m/s) to melt the outer layer without damaging the inner layers. Gradually increase the speed as you progress deeper into the assembly, ensuring complete fusion of all layers.
Practical Tips for Wind Speed Optimization
- Pre-Weld Testing: Conduct trial welds on scrap material to determine the ideal wind speed for the specific plastic type and thickness.
- Gradual Adjustments: Make small, incremental changes to the wind speed rather than large jumps to maintain control over the heating process.
- Monitor Weld Appearance: A smooth, glossy weld pool indicates proper heat input, while a dull or uneven surface suggests incorrect wind speed.
- Use Accessories: Attachments like wind deflectors or nozzles with adjustable openings can help refine airflow and improve weld quality.
By mastering wind speed adjustment techniques, operators can achieve precise, high-quality plastic welds across a wide range of applications. Whether working with thin films, thick components, or complex geometries, understanding the interplay between wind speed, material properties, and welding techniques is key to success.


