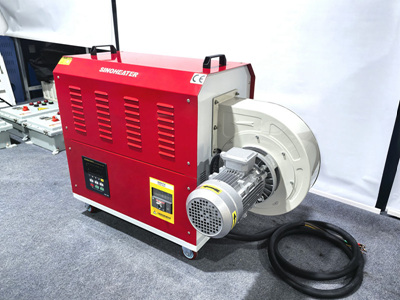
Key Repair Considerations for Heat Blower Fan Motor Failures
A malfunctioning fan motor in a heat blower disrupts airflow, reduces heating efficiency, and may lead to overheating. Diagnosing and repairing motor issues requires systematic testing, disassembly, and component replacement. Below are detailed guidelines to address common motor-related problems.
1. Recognizing Signs of Fan Motor Failure
Identifying symptoms early helps prevent further damage to the heat blower.
- No Airflow or Weak Output: If the heat blower produces little to no air, the fan motor may have failed or is struggling to spin. Listen for the fan—silent operation indicates a motor issue.
- Unusual Noises: Grinding, screeching, or rattling sounds often signal worn bearings, a loose blade, or debris lodged in the motor. These noises typically worsen as the motor degrades.
- Overheating or Shutdowns: A failing motor draws excessive current, causing the heat blower to overheat and trigger thermal protection shutdowns. The unit may feel unusually hot during operation.
2. Initial Troubleshooting Steps
Perform basic checks before disassembling the unit.
- Verify Power Supply: Ensure the heat blower is plugged in and the outlet is functional. Test the outlet with another device to rule out power issues.
- Check for Blockages: Debris in the fan blades or vents can force the motor to overwork. Turn off the unit, unplug it, and inspect the fan area for obstructions. Remove any visible dirt or foreign objects.
- Inspect the Fan Blade: A damaged or warped blade may cause imbalance, straining the motor. Manually spin the blade—it should rotate smoothly without wobbling. If the blade is bent or cracked, it may need replacement.
3. Testing the Fan Motor Electrically
Use a multimeter to assess the motor’s electrical integrity.
- Measure Continuity: Disconnect the heat blower’s power and remove the motor (if accessible). Set the multimeter to resistance (ohms) mode and touch the probes to the motor’s terminals. A reading outside the manufacturer’s specified range (typically a few ohms) indicates a faulty winding.
- Check for Short Circuits: Test continuity between the motor terminals and the motor housing. Zero resistance (or near-zero) means the motor is shorted and must be replaced.
- Inspect Wiring: Examine the motor’s wiring for fraying, burns, or loose connections. Damaged wires can cause intermittent operation or failure. Repair or replace wiring as needed.
4. Disassembling the Heat Blower to Access the Motor
Carefully remove components to reach the fan motor.
- Remove Housing Panels: Unscrew or unclip the heat blower’s outer panels to expose the interior. Keep screws organized to avoid misplacing them.
- Locate the Motor: The fan motor is usually mounted near the fan blade and may be connected to a drive belt or direct-drive system. Refer to the user manual or online diagrams for precise placement.
- Disconnect the Motor: Detach the motor’s wiring harness and any mechanical connections (e.g., belts, screws). Label wires if necessary to ensure correct reassembly.
5. Replacing or Repairing the Fan Motor
Decide whether to repair or replace the motor based on damage severity.
- Motor Replacement: If the motor is shorted, has burnt windings, or is beyond repair, install a compatible replacement. Ensure the new motor matches the original’s voltage, wattage, and RPM specifications.
- Lubricating Bearings (If Applicable): Some motors have sealed or serviceable bearings. If the motor spins stiffly due to dry bearings, apply a few drops of lightweight machine oil to the bearing ports (following the manufacturer’s instructions). Avoid over-lubricating, as excess oil can attract dust.
- Reassembling the Motor: Mount the repaired or new motor securely, reconnect the wiring, and reattach mechanical components. Ensure the fan blade aligns properly to prevent imbalance.
6. Post-Repair Testing and Adjustments
Verify the motor’s function and address any lingering issues.
- Power On the Unit: Plug in the heat blower and turn it on. Listen for smooth, quiet operation and check for consistent airflow. The fan should spin freely without wobbling or noise.
- Monitor Temperature: Run the unit for 10–15 minutes to ensure it doesn’t overheat. If it shuts down prematurely, the motor may still be drawing excessive current, or another component (e.g., capacitor, control board) may be faulty.
- Adjust Fan Speed (If Adjustable): If the heat blower has variable speed settings, test each level to confirm the motor responds correctly. Stuttering or inconsistent speeds may indicate a control board issue.
7. Preventing Future Motor Failures
Adopt maintenance habits to extend the motor’s lifespan.
- Clean the Unit Regularly: Dust buildup near the motor and fan increases friction and overheating risk. Vacuum air vents, filters, and the motor area monthly.
- Avoid Overloading: Using the heat blower in a space larger than its capacity strains the motor. Follow the manufacturer’s guidelines for room size and usage.
- Schedule Professional Inspections: If the unit is used frequently or in harsh environments, have a technician inspect the motor and other components annually to catch potential issues early.
8. Troubleshooting Persistent Motor Issues
If problems persist after repair, deeper faults may exist.
- Check the Capacitor: A failing start or run capacitor can cause the motor to struggle or fail. Test the capacitor with a multimeter (in capacitance mode) and replace it if readings are outside the specified range.
- Inspect the Control Board: A malfunctioning board may send incorrect voltage to the motor, leading to overheating or failure. Look for burnt components, loose connections, or error codes indicating board issues.
- Consult a Professional: If you’re unsure about diagnosing or repairing the unit, seek help from a qualified technician. They can identify complex problems and ensure safe operation.
By following these steps, users can diagnose and repair fan motor failures in their heat blowers. Prioritize safety—always unplug the unit before disassembly and avoid forcing components. Regular maintenance reduces the likelihood of motor-related problems and prolongs the heat blower’s lifespan.


