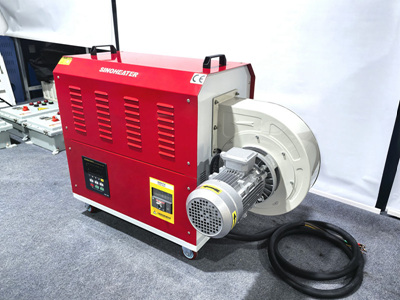
Step-by-Step Guide for Removing Old Paint from Furniture Using Hot Air Blowers
Furniture refinishing often requires stripping old paint or varnish to prepare surfaces for new finishes. Hot air blowers offer an efficient, chemical-free method for softening and removing layers of aged coatings. Below are detailed operational steps to ensure safe and effective paint removal while preserving the integrity of wooden furniture.
Preparing the Workspace and Furniture
Clearing the Area and Protecting Surroundings
Begin by removing all nearby objects, fabrics, and decorations to prevent heat damage or dust contamination. Lay down drop cloths or old sheets to catch falling paint chips. For large pieces like cabinets or tables, position them on sawhorses or a sturdy workbench to elevate the surface for easier access. Ensure the workspace has adequate ventilation by opening windows or using fans to disperse fumes and dust.
Inspecting the Furniture for Weaknesses
Examine the piece for loose joints, cracks, or veneer damage. Heat can exacerbate existing weaknesses, so reinforce unstable areas with wood glue and clamps before proceeding. For antique furniture, document original features (e.g., carvings, inlays) to avoid accidental damage during paint removal. Mark delicate sections with painter’s tape to guide heat application.
Testing Heat Sensitivity
Perform a heat test on an inconspicuous area (e.g., the underside of a table leg). Direct the hot air blower at the surface for 10–15 seconds and observe the reaction. If the paint bubbles without scorching the wood, the temperature is suitable. If discoloration or charring occurs, reduce the blower’s heat setting or increase the distance between the nozzle and the surface.
Operating the Hot Air Blower Safely
Setting Optimal Temperature and Distance
Adjust the blower to a medium-high setting (around 80–100°C for most finishes). Hold the nozzle 5–10 cm away from the surface, moving it in a slow, circular motion to distribute heat evenly. For thick layers of paint (e.g., multiple coats of enamel), work in 15×15 cm sections to prevent overheating. Avoid focusing heat on a single spot for more than 20 seconds to prevent wood warping.
Softening Paint Layers Gradually
As the paint begins to bubble and lift, use a metal scraper or putty knife held at a 30° angle to gently remove the softened material. Work with the grain of the wood to minimize gouging. For curved surfaces (e.g., chair spindles), wrap the scraper in sandpaper to conform to the shape. If the paint resists, reapply heat for 5–10 seconds before scraping again.
Handling Stubborn or Multi-Layered Finishes
For finishes like polyurethane or shellac, which may require repeated heating, alternate between heating and scraping in 30-second intervals. Use a wire brush for intricate details (e.g., carvings) after softening the paint. For lead-based paint (common in older furniture), wear a respirator mask and wet-scrape the debris to reduce airborne particles. Dispose of paint chips in sealed containers.
Post-Removal Cleaning and Surface Preparation
Removing Residual Paint and Adhesive
After scraping, use fine-grit sandpaper (120–220 grit) to smooth the surface and eliminate any remaining paint fragments. For sticky residues (e.g., from old varnish), dampen a cloth with denatured alcohol and wipe the area gently. Avoid over-sanding, as this can thin the wood or alter its profile.
Repairing Surface Imperfections
Fill small cracks or gouges with wood filler matched to the furniture’s color. Allow the filler to dry completely before sanding it flush with the surface. For deeper damage (e.g., missing veneer), consult a professional restorer to ensure structural integrity.
Final Inspection and Dust Removal
Use a tack cloth or vacuum with a brush attachment to remove all dust particles. Inspect the surface under bright light to check for uneven areas or missed spots. If necessary, reapply heat and scrape again. For intricate pieces, use a magnifying glass to examine details like moldings or turnings.
By following these steps, furniture refinishers can achieve a clean, paint-free surface ready for staining, painting, or sealing. Proper workspace setup, controlled heat application, and thorough post-removal cleaning are essential to maintaining the wood’s quality and ensuring a professional finish.


