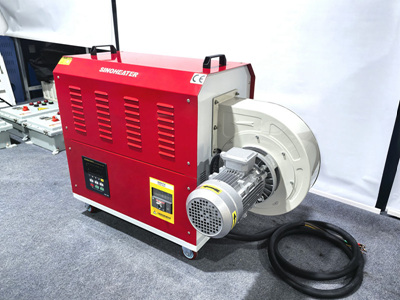
Repair and Handling Methods for Electrical Leakage in Heat Blower Casings
Electrical leakage from a heat blower’s casing poses serious safety hazards, including electric shock risks. Identifying and fixing the source of the leakage requires immediate attention. Below are detailed steps to diagnose and resolve the issue safely.
1. Power Supply and Wiring Inspections
Faulty power connections or damaged wiring are common causes of casing leakage.
- Loose or Damaged Power Cord: A frayed, cracked, or improperly connected power cord can expose live wires, causing leakage. Inspect the cord for visible damage, such as cuts, burns, or loose plugs. Replace the cord if it’s compromised. Ensure the plug fits snugly into the outlet and isn’t loose.
- Internal Wiring Issues: Worn-out insulation or loose wire connections inside the unit may contact the casing. Disconnect power and open the blower’s housing to inspect wiring. Look for frayed wires, burnt connectors, or loose terminals. Repair damaged insulation with electrical tape or replace wires entirely. Tighten loose connections and use wire nuts or terminals to secure them.
- Grounding Faults: An improperly grounded unit fails to divert stray current safely. Check the grounding wire (usually green or bare copper) for continuity using a multimeter. Ensure the grounding prong on the plug is intact and the outlet is properly grounded. If grounding is faulty, consult an electrician to repair the electrical system.
2. Component and Insulation Failures
Damaged internal components or deteriorated insulation can lead to leakage.
- Faulty Heating Element: A cracked or shorted heating element may leak current to the casing. Test the element’s resistance with a multimeter; a reading significantly lower than specified indicates a short. Replace the heating element if faulty, ensuring the new part matches the unit’s specifications.
- Motor or Fan Insulation Breakdown: Worn motor windings or damaged fan insulation can cause leakage. Listen for unusual noises (e.g., buzzing, humming) and check for signs of overheating. If the motor is suspect, test its insulation resistance with a megohmmeter. Replace the motor if insulation is compromised.
- Damaged Control Board or Circuitry: A malfunctioning control board may allow current to leak. Inspect the board for burnt components, swollen capacitors, or cold solder joints. Use a multimeter to check for continuity issues. Replace the control board if repairs aren’t feasible, ensuring proper installation to avoid contact with the casing.
3. Moisture and Environmental Factors
Water ingress or humid conditions can exacerbate leakage risks.
- Water or Condensation Inside the Unit: Moisture from spills, leaks, or high humidity may short-circuit components. Disconnect power and dry the unit thoroughly using a hairdryer (on a cool setting) or by leaving it in a well-ventilated area. Check for water stains or corrosion on internal parts and repair or replace damaged components.
- Poor Ventilation: Operating the blower in a damp or enclosed space increases moisture buildup. Ensure the unit is placed in a dry, well-ventilated area with proper airflow around the casing. Avoid using the blower near sinks, bathrooms, or outdoor areas without waterproofing.
- Seal or Gasket Deterioration: Cracked or missing seals around the casing allow moisture to enter. Inspect gaskets, rubber seals, or weatherstripping for damage. Replace worn seals to prevent water ingress and ensure the casing remains watertight.
4. Casing and Structural Damage
Physical damage to the casing can expose internal components and cause leakage.
- Cracked or Broken Casing: A damaged outer shell may allow internal wires or components to contact the exterior. Inspect the casing for cracks, holes, or loose panels. Repair minor cracks with epoxy or silicone sealant. Replace the casing if it’s severely damaged to restore electrical safety.
- Loose or Exposed Screws/Fasteners: Metal screws or fasteners penetrating the casing without insulation can conduct electricity. Check for loose hardware inside the unit and ensure screws don’t touch live wires. Use plastic or insulated fasteners if necessary, and add electrical tape to cover exposed metal edges.
- Corrosion or Rust: Rust on the casing weakens its integrity and may expose internal parts. Sand corroded areas with fine-grit sandpaper and apply rust-inhibiting paint. Replace heavily rusted components to prevent further deterioration and leakage risks.
5. Safety Precautions and Professional Help
Addressing electrical leakage requires strict adherence to safety protocols.
- Always Disconnect Power: Before inspecting or repairing the unit, unplug it from the outlet or switch off the circuit breaker. Use a voltage tester to confirm the unit is de-energized.
- Wear Protective Gear: Use insulated gloves and safety goggles when handling electrical components. Avoid touching the casing or internal parts while the unit is plugged in.
- Consult a Licensed Electrician: If the issue persists after basic troubleshooting, or if you’re uncomfortable with electrical repairs, hire a professional. Electricians have the tools and expertise to diagnose complex leakage problems safely.
By following these steps, users can mitigate electrical leakage risks and restore their heat blower’s safety. Prioritize caution and seek professional assistance when in doubt to prevent accidents or further damage.


