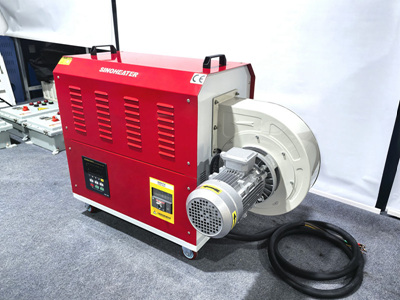
Replacing a Faulty Temperature Sensor in a Heat Blower
A malfunctioning temperature sensor in a heat blower can cause erratic heating, overheating, or failure to activate. Replacing the sensor requires careful disassembly, testing, and installation. Below are detailed steps to ensure a successful replacement.
1. Identifying a Faulty Temperature Sensor
Recognizing symptoms of sensor failure helps confirm the need for replacement.
- Inconsistent Temperature Control: The heat blower may cycle on and off frequently, fail to reach set temperatures, or produce uneven heat. These issues often indicate inaccurate sensor readings.
- Overheating or Shutdowns: If the unit shuts off unexpectedly or runs excessively hot, the sensor may not be detecting temperatures correctly, triggering thermal protection mechanisms.
- Error Codes or Indicator Lights: Some heat blowers display error codes or light patterns when the sensor fails. Consult the user manual to interpret these signals.
2. Gathering Tools and Safety Precautions
Prepare the necessary tools and ensure safety before starting the repair.
- Essential Tools: A screwdriver set (Phillips and flathead), multimeter, replacement sensor (compatible with your model), wire cutters/strippers (if needed), and electrical tape.
- Safety Measures: Unplug the heat blower and allow it to cool completely before working on it. Wear gloves to protect against sharp edges and static discharge, which can damage internal components.
- Work Area: Choose a clean, well-lit space to disassemble the unit. Lay down a soft cloth to prevent scratching the housing.
3. Accessing the Temperature Sensor
Locate and remove the sensor from the heat blower’s interior.
- Locate the Sensor: The temperature sensor is typically a small, cylindrical component with two wires attached. It may be mounted near the heating element, air intake, or outlet vent. Refer to the user manual or online diagrams for precise placement.
- Remove Housing Panels: Unscrew or unclip the heat blower’s housing panels to access the internal components. Keep screws organized to avoid misplacing them.
- Disconnect Wiring: Gently pull the sensor’s wires from their connectors. If the wires are soldered, use wire cutters to sever the connection, leaving enough length to reattach the new sensor.
4. Testing the Old Sensor (Optional)
Verify the sensor’s failure before installing a replacement.
- Use a Multimeter: Set the multimeter to resistance (ohms) mode. Touch the probes to the sensor’s terminals and note the reading. Compare it to the manufacturer’s specifications—a faulty sensor may show infinite resistance (open circuit) or erratic values.
- Check for Physical Damage: Inspect the sensor for cracks, corrosion, or loose wires. Physical damage often coincides with electrical failure.
5. Installing the New Temperature Sensor
Attach the replacement sensor securely and reconnect the wiring.
- Prepare the New Sensor: If the new sensor has pre-attached wires, strip ¼ inch of insulation from the ends. If it’s a direct replacement for a soldered sensor, ensure the wires are long enough to reach the connectors.
- Mount the Sensor: Position the new sensor in the same location as the old one. Secure it with screws, clips, or adhesive (as applicable). Ensure it’s firmly attached but not overtightened, which could damage it.
- Reconnect Wiring: Attach the sensor’s wires to the corresponding connectors. If the wires were cut, splice them using wire nuts or solder, then wrap the connections with electrical tape for insulation.
6. Reassembling and Testing the Heat Blower
Rebuild the unit and verify the repair.
- Replace Housing Panels: Screw or clip the housing panels back into place. Double-check that all components are secure and no wires are pinched.
- Power On the Unit: Plug in the heat blower and turn it on. Set it to a medium temperature and monitor its operation. The unit should heat evenly and cycle on/off smoothly.
- Monitor for Errors: Watch for error codes, unusual noises, or overheating. If issues persist, the sensor may not be the only problem—check the heating element, fan, or control board for additional faults.
7. Preventing Future Sensor Failures
Adopt maintenance habits to extend the sensor’s lifespan.
- Clean the Heat Blower Regularly: Dust buildup near the sensor can cause inaccurate readings. Vacuum air vents, filters, and the sensor area monthly to prevent obstructions.
- Avoid Overloading the Unit: Using the heat blower in a space larger than its capacity can strain the sensor and other components. Follow the manufacturer’s guidelines for room size and usage.
- Inspect Wiring Annually: Loose or frayed wires can disrupt sensor function. Periodically check the sensor’s wiring for damage and tighten connections if needed.
8. Troubleshooting Persistent Issues
If the heat blower still malfunctions after sensor replacement, deeper problems may exist.
- Check the Control Board: A faulty control board may misinterpret sensor readings. Look for burnt components, loose connections, or error codes indicating board failure.
- Test the Heating Element: An aging or damaged heating element can cause temperature fluctuations that the sensor struggles to compensate for. Use a multimeter to test the element’s continuity.
- Consult a Professional: If you’re unsure about diagnosing or repairing the unit, seek help from a qualified technician. They can identify complex issues and ensure safe operation.
By following these steps, users can replace a faulty temperature sensor in their heat blower and restore proper temperature regulation. Prioritize safety and accuracy during the repair to avoid damaging the unit or voiding warranties. Regular maintenance reduces the likelihood of future sensor failures.


