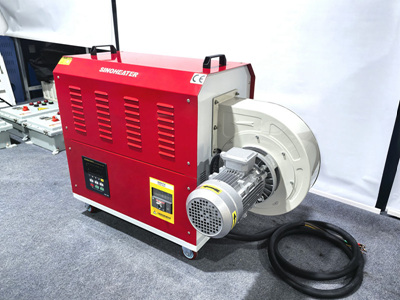
Troubleshooting Heat Blower Issues After High-Temperature Use
Prolonged exposure to extreme heat can cause overheating, component degradation, and safety hazards in heat blowers. Identifying and addressing thermal damage quickly prevents permanent failures. Below are detailed steps to diagnose and fix common post-high-temperature problems.
1. Identifying Symptoms of Heat-Related Damage
Recognizing early signs of overheating helps prioritize repairs.
- Unit Shuts Down Unexpectedly: If the heat blower powers off mid-use, it may have triggered thermal protection due to overheating. Some units also display error codes or flashing lights to indicate overheating.
- Burning Odor or Smoke: A strong, acrid smell or visible smoke suggests overheated wiring, insulation, or motor windings. Immediately unplug the unit if these signs occur.
- Warped or Melted Plastic Parts: High temperatures can deform housing panels, buttons, or vents. Check for discoloration, softening, or physical distortion in plastic components.
2. Initial Safety and Cooldown Procedures
Ensure safety and allow the unit to cool before inspection.
- Unplug and Wait: Turn off and unplug the heat blower. Let it sit for at least 30–60 minutes in a well-ventilated area to cool down. Avoid touching internal components until they are safe to handle.
- Inspect for Visible Damage: Once cooled, remove housing panels to check for melted wires, burnt insulation, or charred components. Pay close attention to the motor, heating element, and circuit board.
- Check for Blocked Vents: Overheating often results from restricted airflow. Ensure intake and exhaust vents are free of dust, debris, or obstructions. Clean vents gently with a brush or compressed air.
3. Testing and Repairing Overheated Components
Address damaged parts to restore functionality.
- Inspect the Motor: Overheating can cause motor windings to short or bearings to seize. Use a multimeter to test for continuity and resistance. A burnt smell or discolored housing indicates irreparable damage, requiring motor replacement.
- Examine the Heating Element: A failing heating element may overheat, melt nearby components, or produce inconsistent heat. Test for continuity—a break means the element needs replacement.
- Check the Circuit Board: High temperatures can warp or delaminate circuit boards. Look for burnt traces, swollen capacitors, or cracked solder joints. If the board is severely damaged, professional repair or replacement may be necessary.
4. Addressing Wiring and Electrical Issues
Repair or replace damaged wiring to prevent short circuits.
- Inspect Wiring for Damage: Heat can melt insulation, exposing wires. Check for frayed, brittle, or discolored cables. Replace any damaged wiring with compatible gauge and insulation.
- Test Thermal Fuses or Cutoffs: Many heat blowers have thermal fuses that trip during overheating. Use a multimeter to check continuity—a blown fuse must be replaced with an identical part.
- Clean and Secure Connections: Loose or corroded connections increase resistance and heat buildup. Tighten terminals, clean contacts with a wire brush, and apply dielectric grease to prevent oxidation.
5. Reassembling and Testing the Heat Blower
Rebuild the unit carefully and verify repairs.
- Reinstall Components: Securely reattach the motor, heating element, circuit board, and housing panels. Ensure all wiring is routed correctly and connections are tight.
- Power On the Unit: Plug in the heat blower and turn it on. Monitor for unusual noises, smells, or error codes. Run the unit on a low setting for 10–15 minutes to check for overheating.
- Test Temperature Output: Use a thermometer to measure the air temperature at the outlet. It should reach the expected range for the selected setting without excessive fluctuations.
6. Preventing Future Overheating Issues
Adopt measures to protect the heat blower in high-temperature environments.
- Improve Ventilation: Avoid using the unit in enclosed spaces or near heat sources (e.g., stoves, heaters). Ensure air can circulate freely around the heat blower.
- Clean Filters and Vents Regularly: Dust buildup restricts airflow and traps heat. Clean or replace filters monthly and use compressed air to blow debris from vents.
- Monitor Usage Time: Avoid running the heat blower continuously for extended periods. Allow it to cool down between cycles to prevent thermal stress.
7. Troubleshooting Persistent Overheating Problems
If issues persist, deeper faults may require professional attention.
- Check for Faulty Sensors: Some units have temperature sensors that malfunction, causing overheating. Test sensors with a multimeter or consult a technician for calibration.
- Inspect the Fan Operation: A failing fan motor or blocked fan blade reduces airflow, leading to overheating. Ensure the fan spins freely and produces strong airflow.
- Evaluate Power Supply: Inconsistent voltage or power surges can stress components. Use a surge protector and avoid overloading circuits.
8. Addressing Thermal Degradation in Plastic Parts
Replace or reinforce warped or melted components to restore structural integrity.
- Replace Damaged Plastic: If housing panels, buttons, or vents are warped or cracked, replace them with compatible parts. Avoid using the unit with damaged plastics, as they may pose safety risks.
- Reinforce Weakened Areas: For minor warping, use heat-resistant adhesive or clamps to reshape components. Ensure no internal parts are obstructed after repairs.
- Avoid Future Heat Exposure: Store the heat blower in a cool, dry place when not in use. Do not leave it in direct sunlight or near heat sources.
By following these steps, users can repair heat blowers damaged by high temperatures and restore safe operation. Prioritize safety during disassembly and testing, and avoid using the unit until repairs are complete. Regular maintenance and proper usage minimize the risk of future overheating issues.


