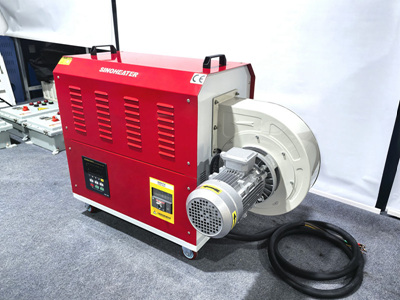
Troubleshooting and Repairing Internal Electrical Shorts in Heat Blowers
An internal electrical short in a heat blower can cause circuit breaker trips, blown fuses, overheating, or even fire hazards. Identifying and fixing the source of the short requires systematic inspection and repair. Below are detailed steps to diagnose and resolve short-circuit issues.
1. Recognizing Signs of a Short Circuit and Initial Safety Checks
Understanding symptoms and prioritizing safety are essential before starting repairs.
- Identify Symptoms: Common signs of a short include the heat blower failing to power on, tripping circuit breakers immediately after activation, or emitting burning smells. The unit may also produce sparks or unusual noises during operation.
- Unplug the Unit: Disconnect the heat blower from the power source immediately if a short is suspected. Avoid touching the unit or its components until it is de-energized to prevent electric shock.
- Inspect for Visible Damage: Examine the power cord, plug, and the unit’s exterior for signs of burns, melted plastic, or exposed wires. If the cord is damaged, replace it before proceeding with internal inspections.
2. Locating the Short Circuit Inside the Heat Blower
Systematically check components to pinpoint the short’s origin.
- Open the Housing: Remove screws or clips securing the heat blower’s casing. Carefully lift or slide off the cover to access the internal wiring, motor, heating element, and control board.
- Check for Burnt or Melted Components: Look for discolored wires, charred insulation, or melted connectors. These often indicate where the short occurred. Pay close attention to areas near the motor, heating element, and power entry point.
- Inspect Wiring Harnesses: Examine wire bundles for frayed, pinched, or broken wires. Wires rubbing against sharp edges or moving parts are prone to shorting. Gently tug wires to check for loose connections or exposed copper.
3. Testing for Continuity and Short Circuits
Use a multimeter to identify faulty connections or damaged wires.
- Set Up the Multimeter: Switch the multimeter to continuity (ohms) mode or resistance mode. A reading of zero or near-zero ohms indicates a direct connection (short), while infinite resistance suggests an open circuit.
- Test Wiring Segments: Disconnect the heat blower’s power cord and isolate individual wire segments. Test each wire by touching the multimeter probes to its ends. A short will show minimal resistance between wires that shouldn’t be connected.
- Check Components in Isolation: Disconnect the motor, heating element, and control board from the wiring. Test each component’s terminals for shorts. For example, a shorted motor winding will show continuity between its power leads when it shouldn’t.
4. Repairing or Replacing Damaged Wiring
Fix or replace wires causing the short to restore proper electrical flow.
- Strip and Splice Damaged Wires: For minor breaks or frays, cut out the damaged section and strip ½ inch of insulation from the healthy ends. Twist the strands together, secure with a wire nut, and wrap with electrical tape. Use heat-shrink tubing for added durability.
- Replace Severely Damaged Wires: If wires are burnt, melted, or too short to splice, replace them with new ones of the same gauge and length. Route replacement wires away from sharp edges or moving parts to prevent future damage.
- Reinforce Insulation: Wrap repaired or new wires with electrical tape or use heat-shrink tubing to protect against abrasion. Ensure no bare copper is exposed where wires connect to components.
5. Addressing Faulty Components Causing Shorts
Replace or repair components that are shorted internally.
- Motor Issues: If the motor is shorted, it may hum, overheat, or trip breakers. Disconnect the motor and test its windings for continuity between phases. A shorted winding requires motor replacement.
- Heating Element Problems: A damaged heating element can short to ground or between coils. Test the element with a multimeter—continuity between element terminals is normal, but continuity to the casing indicates a ground fault. Replace the element if faulty.
- Control Board Malfunctions: Burnt traces, blown capacitors, or damaged relays on the control board can cause shorts. Inspect the board visually and test components with a multimeter. Replace the board if repairs aren’t feasible.
6. Reassembling and Testing the Heat Blower
Ensure the unit operates safely after repairs.
- Reconnect Wiring and Components: Carefully route wires back into their harnesses and reconnect them to the motor, heating element, and control board. Secure connections with zip ties or clips to prevent them from coming loose.
- Reinstall the Casing: Align the housing panels and fasten them securely. Ensure no wires are pinched between the casing and internal components.
- Power On and Monitor: Plug in the heat blower and turn it on at a low setting. Listen for unusual noises, smell for burning, and check if the circuit breaker remains stable. Run the unit for several minutes to confirm the short is resolved.
7. Preventing Future Short Circuits
Take steps to minimize the risk of recurring shorts.
- Improve Wire Routing: Secure wires with clips or cable ties to keep them away from moving parts, sharp edges, or heat sources. Avoid coiling wires tightly, as this can trap heat.
- Inspect Regularly: Periodically check the power cord, internal wiring, and components for signs of wear. Replace damaged parts promptly to prevent escalation.
- Use Surge Protection: Plug the heat blower into a surge protector to guard against voltage spikes that could damage components and cause shorts.
By following these steps, users can effectively troubleshoot and repair internal short circuits in their heat blowers. Always prioritize safety and consult a professional if unsure about electrical repairs or component testing.


