
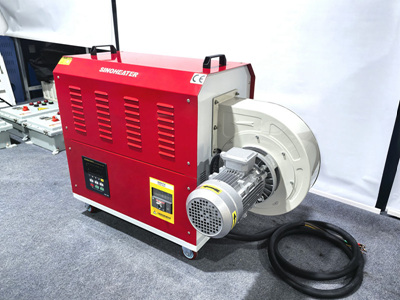
Hot Air Gun Blowing Cold? How to Debug Low Outlet Temperature Faults Step by Step
A hot air gun that should be pushing 500°C out the nozzle is barely getting past 150°C. The heater clicks on, the fan spins, but the air coming out feels lukewarm. This is one of the most common field faults in hot air guns, and it is almost never a single-point failure. The temperature drop is usually a chain of small problems stacking on top of each other, each one shaving off a few degrees until the output is useless.
Troubleshooting this properly means checking the heat source, the airflow path, and the control loop in that order. Skip any one of them and you will be chasing the wrong symptom all day.
The Heater Element Itself Is Usually Not the Problem
Check Resistance First Before Replacing Anything
When outlet temperature drops, the first instinct is to blame the heating element. In practice, the element is rarely the culprit. But you still need to verify it before moving on.
Disconnect power and measure the element resistance with a multimeter. Compare the reading to the rated value on the specification sheet. A nichrome element that reads open or significantly higher than spec is dead — replace it. One that reads lower than spec has a partial short, which means it is drawing too much current and the thermal protector may be cutting in early, which also kills output temperature.
But here is the thing most people miss: an element can measure perfectly fine and still underperform. The resistance tells you the wire is intact. It does not tell you whether the element is making good contact with the ceramic core or whether the ceramic has developed a hairline crack that breaks the thermal path.
How Element Degradation Actually Shows Up
Nichrome wire degrades slowly. After hundreds of heat cycles, the wire thins at the hottest spots, resistance climbs, and the element produces less heat per watt of input power. The element still glows. The fan still runs. But the temperature at the nozzle drops by 30 to 50 degrees, and most operators do not notice until the gun stops performing its job.
Measure the element under load if you can. Apply rated voltage and watch the current draw. If it is significantly below the rated current, the element has degraded. If the current is normal but the temperature is low, the problem is downstream — in the airflow or the nozzle.
Airflow Problems Are the Real Killer
The Fan Is Not Moving Enough Air
A hot air gun is only as hot as the air it pushes through the heater. If the fan slows down, air velocity drops, residence time in the heating zone shrinks, and the air exits before it can absorb enough heat. This is the single most common cause of low outlet temperature, and it is the one most technicians overlook because the fan “sounds like it is running.”
Measure fan voltage under load. A fan that should be getting 24V but is only seeing 18V because of a loose connector or a corroded wire will spin at maybe 60% of its rated speed. That 40% drop in airflow can knock 100°C off the outlet temperature.
Check the fan blades for dust buildup. A thin layer of dust on the blades changes the aerodynamic profile and reduces volume. In industrial environments where the gun picks up resin dust, talc, or fiber particles, this happens fast. Clean the blades with compressed air and re-test.
Blocked Air Intake or Nozzle Restriction
If the air intake filter is clogged, the fan cannot pull enough air through the system. The same goes for a partially blocked nozzle. Both create back pressure that reduces flow rate.
Pull the intake filter and hold it up to a light. If you cannot see through it, replace or clean it. Check the nozzle for any obstruction — dried adhesive, melted plastic, debris from the workpiece. Even a partial blockage at the nozzle tip can cause a dramatic temperature drop because the heated air has nowhere to go and recirculates inside the barrel, soaking up heat from the element housing instead of exiting as useful hot air.
Temperature Sensor Drift Is a Silent Fault
The Thermocouple Is Lying to the Controller
Most hot air guns use a thermocouple or an NTC thermistor to measure outlet temperature and feed that back to the control board. If the sensor drifts, the controller thinks the temperature is higher than it actually is, so it reduces power to the heater. The result: the gun runs at half power and you get half the temperature.
Test the sensor independently. Disconnect it from the controller and measure its resistance at room temperature. For an NTC, it should read close to the specified value at 25°C — typically 10kΩ or 100kΩ depending on the type. If it reads significantly off, the sensor is drifted and needs replacement.
For a thermocouple, use a millivolt meter. At room temperature, a Type K thermocouple should read close to 0mV. If it is reading several millivolts with no heat applied, the junction is contaminated or the wire is damaged.
Sensor Placement Matters More Than Sensor Quality
Even a good sensor gives bad data if it is in the wrong spot. The sensor must sit in the airstream, not against the barrel wall where it reads the metal temperature instead of the air temperature. A sensor pressed against the barrel will read 200°C when the actual air is 120°C, and the controller will cut power prematurely.
Check the sensor mounting. It should be recessed into the airflow path, centered, and not touching any metal surface. If the mounting bracket has shifted or the sensor has migrated out of position during a previous repair, re-seat it and recalibrate.
Control Board and Power Delivery Issues
The SSR or TRIAC Is Not Firing Fully
The heater power is usually switched by an SSR (solid-state relay) or a TRIAC on the control board. If this component is partially failed, it passes only a fraction of the AC waveform to the heater. The element gets power, but not enough to reach full temperature.
Check the SSR output with an oscilloscope if you have one. A healthy SSR should pass the full sine wave when commanded on. A degraded SSR will clip the waveform, pass only the peak portion, or fire intermittently. The heater gets warm but never reaches full temperature.
Without an oscilloscope, measure the AC voltage at the heater terminals while the gun is running. If it is significantly below the mains voltage — say 180V on a 230V system — the SSR is not conducting fully. Replace it.
Loose Connections on the Power Path
This sounds obvious, but loose screw terminals on the heater circuit are a major source of intermittent low-temperature faults. A loose connection adds resistance, which drops voltage across the connection instead of across the heater. The element gets less power, the temperature drops, and the problem gets worse as the connection heats up and expands.
Check every screw terminal from the mains input to the heater element. Tighten anything that moves. Look for discoloration on the terminals — a brown or black mark means arcing has occurred there, and the terminal may need replacement even after tightening.
Environmental and Usage Factors That Fake a Fault
Ambient Temperature and Duty Cycle
A hot air gun rated for 500°C outlet temperature at 25°C ambient will struggle to hit that mark at 5°C ambient. The incoming air is colder, so it absorbs more heat before reaching the target temperature. The controller compensates by increasing power, but if the heater is already at maximum, it simply cannot reach the setpoint.
Also check the duty cycle. If the gun has been running continuously for more than 10 to 15 minutes, thermal protection may be kicking in to prevent overheating of internal components. The outlet temperature drops not because the heater is weak, but because the controller is deliberately backing off. Let the gun cool for 5 minutes and re-test. If the temperature comes back up, it was a thermal protection event, not a fault.
Voltage Supply Variation
Low mains voltage directly reduces heater output. If the facility voltage is running 10% below nominal, the heater produces roughly 19% less power (since power is proportional to V squared). Measure the mains voltage at the gun’s power input while it is running. If it is below the rated voltage, the low temperature is a supply issue, not a gun issue.
A Practical Debug Sequence That Saves Time
Start with airflow. Check fan voltage, clean the filter, clear the nozzle. This fixes the problem about 40% of the time.
Then check the sensor. Measure resistance or millivolts, verify placement. This catches another 25% of cases.
Then check the heater element resistance and the SSR output. This covers most of the remaining faults.
Only after those three steps should you start looking at the control board firmware or replacing the entire heater assembly. Most low-temperature faults are mechanical or electrical, not electronic. Find the airflow problem first, and you will save yourself hours of unnecessary board-level debugging.


