Hot Air Blower Overheating Protection Test After Installation: How to Verify Your Safety Cutoffs Work
Every hot air blower comes with thermal protection built in. That is not a luxury feature — it is a safety requirement. The question is whether that protection actually works after you mount the unit, wire it up, and connect it to the rest of the system. A thermostat that worked fine on the factory floor can behave completely differently once it is sitting in a wall bracket with restricted airflow and a cluttered intake.
Testing the overheating protection after installation is not optional. It is the step that separates a safe system from a fire waiting to happen.
Why Overheating Protection Testing Gets Skipped
Most installers run the blower for a few minutes, confirm it heats up, and call it done. Nobody deliberately tries to trigger a thermal shutdown. It feels like tempting fate. But skipping this test means you have no proof that the protection works when you actually need it.
Overheating protection exists for a reason. Motors burn out. Heating elements crack. Wiring melts. In extreme cases, the housing itself can reach temperatures that ignite nearby materials. The thermal cutoff is the last line of defense between a controlled shutdown and a real emergency.
You need to know that this last line of defense holds. The only way to know is to test it.
How Thermal Protection Actually Works
The Two Main Types of Overheat Safeguards
Most blowers use one or both of these methods. The first is a thermal fuse — a one-time device that physically breaks the circuit when it reaches a set temperature. Once it blows, the unit is dead until you replace the fuse. There is no reset.
The second is a thermal cutoff switch — a resettable device that opens the circuit when it gets too hot and closes again when it cools down. This is the more common type in modern blowers because it lets the unit recover on its own after a temporary overload.
Some units also have a motor thermal protector wired into the motor windings. This one trips when the motor itself overheats, regardless of what the housing temperature is doing. It protects the motor directly rather than relying on ambient temperature readings.
Knowing which type your blower uses matters because the test procedure is slightly different for each one.
Where the Sensors Sit and What They Monitor
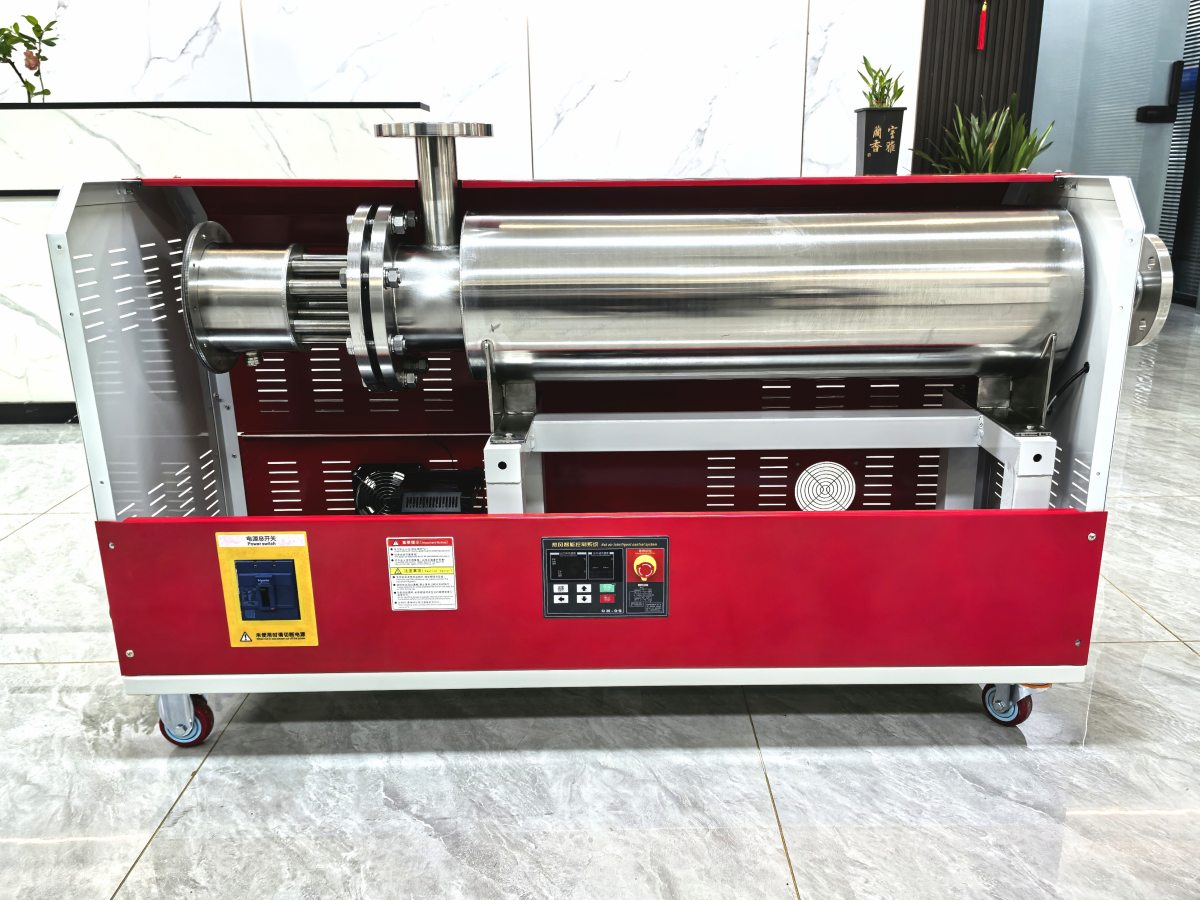
The thermal sensor is usually tucked inside the motor housing or mounted directly on the heating element. It measures the temperature of the component it is attached to, not the room temperature. This is important. The sensor does not care how warm the room is — it only cares whether the blower itself is about to overheat.
Some units have a second sensor on the outlet side that monitors the temperature of the air leaving the blower. This one protects against blocked airflow. If the outlet gets too hot because air cannot escape, the sensor trips and shuts the unit down.
Both sensors need to be tested. One protects the motor. The other protects against external blockage. Ignore either one and you have a blind spot in your safety system.
How to Perform the Overheating Protection Test
Simulating a Blocked Intake
The most common cause of overheating is a blocked intake. Dust, debris, a closed damper, or even a piece of furniture pushed too close to the unit can starve it of cool air. The motor keeps running, the temperature climbs, and eventually the thermal protector trips.
To test this, partially cover the intake vent with a piece of cardboard or thick fabric. Do not block it completely — you want to simulate a restricted intake, not a total blockage. Run the blower on full heat at the highest fan speed.
Watch the motor housing temperature. It should start climbing within 2 to 3 minutes. The thermal protector should trip within 5 to 8 minutes of the restriction being in place. When it trips, the blower shuts off completely. That is exactly what should happen.
Remove the obstruction and let the unit cool for 10 minutes. If it has a resettable thermal cutoff, it should start normally again. If it has a thermal fuse, it will not restart until the fuse is replaced. Either way, the protection did its job.
Simulating a Blocked Outlet
Now test the outlet sensor. Cover the outlet vent with a heavy cloth or towel. This simulates a situation where hot air has nowhere to go — maybe a duct got disconnected, or a damper got closed by accident.
Run the blower on full heat. The outlet temperature will spike rapidly. The outlet thermal sensor should detect this and shut the unit down within 3 to 5 minutes. Again, this is the behavior you want to see.
Uncover the outlet and let the unit cool. Verify that it restarts properly. If it does not restart after cooling, check whether the thermal fuse blew or the resettable switch needs a manual reset. Consult the wiring diagram to find the reset button if one exists.
Testing the Motor Thermal Protector
This one requires a bit more patience. Run the blower continuously at full load for 30 minutes. This is longer than normal operation but it puts sustained stress on the motor.
After 30 minutes, feel the motor housing. It should be warm but not scorching. If the motor thermal protector is working, it will trip before the housing gets dangerously hot. You should hear the blower shut off with a distinct click.
If it runs for 30 minutes without tripping, the motor protector may be too sensitive or miscalibrated. If it never trips even after 45 minutes, the protector may be defective. In either case, do not ignore it. Replace or recalibrate the protector before putting the unit into regular service.
What Happens When the Protection Fails
The Unit Runs Hot but Never Shuts Down
This is the worst-case scenario. The blower keeps running even though the temperature is climbing past safe limits. The motor windings start to degrade. Insulation on the wiring softens. Plastic components warp. Eventually something catches fire.
If your test reveals that the blower does not shut down under simulated blockage conditions, do not use it. Pull it out, replace the thermal protector, and retest. A blower without working overheat protection is a liability, not a heater.
The Unit Trips Too Easily
On the flip side, a protector that trips at normal operating temperatures is just as frustrating. The blower shuts down every 10 minutes during regular use. The motor cycles on and off constantly, which wears out the starter and the thermal protector itself.
If the blower trips during your test under conditions that should be normal — like full speed with a clear intake and outlet — the protector is too sensitive. Check the sensor placement. Sometimes the sensor gets pressed too tightly against the housing during installation, giving it a false high reading. Loosen it slightly and retest.
Things That Affect Overheating Protection Performance
Installation Environment Matters
A blower mounted in a tight corner with no clearance on three sides will overheat faster than one sitting in open space. The thermal protector is designed for normal installation conditions, not for being suffocated by walls and furniture.
If your installation has restricted clearance, the protector may trip more often than expected. This is not a defect — it is a sign that the installation needs more breathing room. Go back and add the clearance you skipped during mounting.
Dust Buildup Changes Everything
A clean blower passes the overheat test easily. A dirty blower may fail it. Dust on the intake screen restricts airflow. Dust on the motor fins traps heat. Dust on the thermal sensor insulates it from the actual temperature, causing delayed or missed trips.
Run the overheat test on a clean unit first. Then run it again after simulating dust buildup — cover the intake with a fine mesh screen to mimic a clogged filter. The protector should still trip, but it may take a minute or two longer. If the delay is more than 5 minutes, the sensor needs cleaning or the filter maintenance schedule needs to be tighter.
Voltage Fluctuations Throw Off the Readings
Low voltage causes the motor to draw more current. More current means more heat. A blower running on 10 percent low voltage may trigger the thermal protector even though nothing is wrong with the airflow.
Check the supply voltage before running the test. It should be within 5 percent of the rated value. If your building has unstable power, run the test at the lowest voltage you expect to see during normal operation. The protector should still trip under blockage conditions even at reduced voltage.
Documenting Your Overheat Protection Test Results
Write down everything. Date, time, ambient temperature, voltage at the time of test, which sensor you tested, how long it took to trip, whether the unit restarted after cooling, and any adjustments you made.
Take a photo of the thermal protector and its wiring. Note the part number if visible. Store this with your commissioning files.
If the protector tripped during the test, note that as well. A protector that trips during testing is doing its job. The problem is only if it does not trip when it should.
Repeat this test every six months. Thermal protectors degrade over time. A fuse that worked perfectly on day one may be ready to fail a year later. Catching it during a scheduled test beats catching it during an emergency.