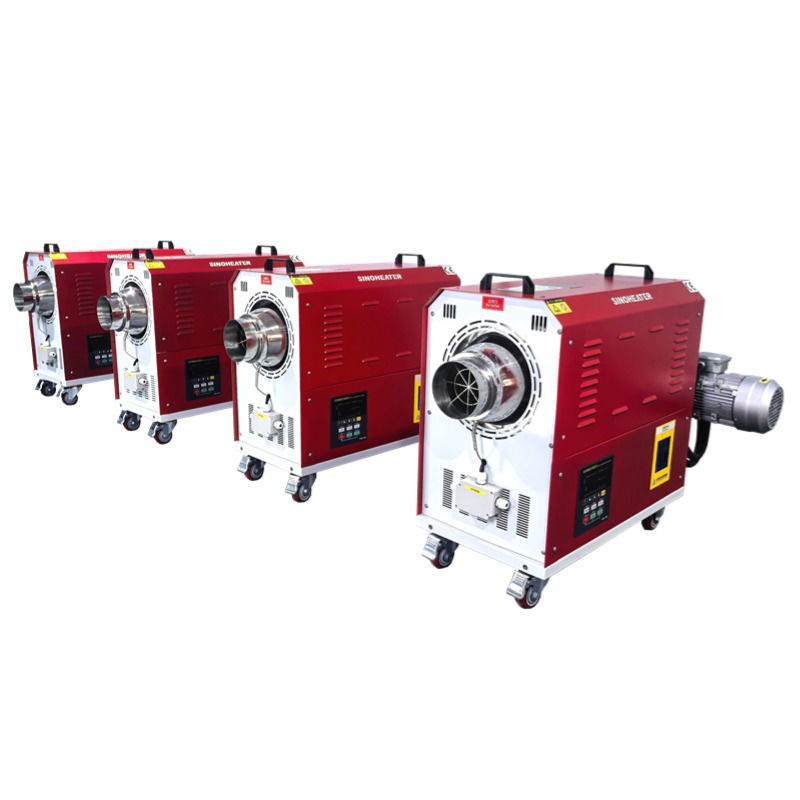
Heater Housing Damaged? How to Repair or Replace the Outer Shell Without Wrecking the Unit
A dented, cracked, or melted housing on a hot air heater looks bad. But it’s not just a cosmetic problem — a damaged shell exposes internal components, disrupts airflow, and can create serious safety hazards. People ignore housing damage for months because the heater still runs. Then one day something falls out, or the casing shorts against a pipe, and suddenly it’s an emergency. Fixing the housing isn’t hard, but doing it wrong makes things worse.
What Actually Damages a Heater Housing
Impact and Physical Abuse
The most common cause is a knock. Someone bumps the heater with a cart, a tool falls on it, or it gets pushed against a wall during cleaning. The thin metal or plastic shell dents easily. On metal housings, the dent doesn’t just look bad — it changes the shape of the air channel. Airflow gets redirected, the blower works harder, and the motor overheats.
Plastic housings crack instead of denting. A crack along the seam or a corner stress point spreads over time, especially if the heater gets hot and cold repeatedly. The plastic becomes brittle, and the next bump finishes it off.
Heat Damage From the Inside
The housing isn’t just there for looks — it channels airflow. When the internal temperature climbs too high, the housing softens or warps. This happens when the air filter is clogged, the blower is failing, or the thermostat is stuck. The element keeps heating but air can’t move through the system fast enough. The housing absorbs that excess heat and deforms.
Melted plastic housings are a dead giveaway that something internal went wrong first. The housing didn’t fail on its own — it failed because the airflow stopped and the heat had nowhere to go.
Corrosion and Rust
In humid environments or near chemical fumes, metal housings corrode from the outside in. Rust eats through the thin gauge metal, creates holes, and weakens the structure. A rusted housing can’t support its own weight, and internal components start falling out.
Even aluminum housings corrode in the right conditions. The white powdery residue you see on old heater casings is aluminum oxide — and it means the metal is thinning.
Why a Damaged Housing Is More Serious Than It Looks
It Changes the Airflow Path
The housing is designed to direct air from the blower to the outlet in a specific pattern. A dent or a crack redirects that air. Some vents get blocked, others get too much flow. The result is uneven heating, hot spots inside the unit, and the blower working against itself.
You might not notice this right away. But over weeks, the altered airflow puts extra stress on the motor and the element. The motor burns out faster. The element fails sooner. The housing damage started a chain reaction that ends with a dead heater.
It Exposes Live Components
A crack in the housing can expose wiring, terminals, or the heating element. In a metal housing, a crack that touches the frame can create a ground fault. In a plastic housing, a crack near the element can let heat build up in the wrong spot and start a fire.
This isn’t theoretical. Damaged housings are one of the top causes of heater fires in industrial settings. The heater still runs, the crack looks small, and nobody thinks twice about it. Until something ignites.
It Lets Dust and Debris Into the Blower
The housing seals the blower compartment from the outside environment. When that seal is broken, dust, insects, and moisture get pulled directly into the blower wheel. The blower wasn’t designed to handle unfiltered air. The blades get coated in debris, the balance shifts, and the motor fails from vibration and contamination.
A small crack in the housing can destroy the blower in weeks. The blower was fine until the housing let the outside in.
How to Repair a Damaged Heater Housing
Metal Housing Dents — When You Can Fix Them
Small dents on metal housings can sometimes be pushed back out from the inside. Remove the internal components first — the blower, the element, the wiring. Then use a rubber mallet or a wooden dowel to gently tap the dent from the inside out. Work slowly. Metal work-hardens if you hit it too hard, and then it cracks instead of bending.
If the dent is on the outside and you can’t reach the inside, heat the metal gently with a heat gun (not a torch) and tap it from the outside. The heat softens the metal enough to reshape it. Don’t overheat — you’ll burn the paint or damage nearby components.
Plastic Housing Cracks — Welding or Epoxy
Plastic cracks don’t bend back. They need to be bonded. For small cracks, a two-part epoxy rated for high heat works fine. Clean the crack thoroughly, roughen the surface with sandpaper, apply the epoxy, and clamp it until it cures. This holds for years if the surface is prepped properly.
For larger cracks or melted sections, plastic welding is better. A soldering iron with a plastic rod fills the gap and fuses the material back together. It’s not pretty, but it’s strong. The weld line won’t look factory-smooth, but it will hold the housing together and restore the seal.
Don’t use superglue on plastic housings. It gets brittle under heat and will crack again within weeks. Epoxy or plastic weld are the only options that last.
When Repair Isn’t Worth It — Just Replace the Housing
If the housing is severely corroded, melted in multiple spots, or cracked along a structural seam, don’t repair it. Replace it. A compromised housing can’t be trusted to protect the internal components, and no amount of epoxy will restore the original airflow design.
Find the housing by model number. Don’t try to adapt a housing from a different unit — the mounting points, airflow channels, and clearances won’t match. A mismatched housing creates gaps, restricts airflow, and can cause the heater to overheat.
Replacing the Heater Housing Step by Step
Disconnect Everything Before You Touch the Housing
Unplug the heater or lock out the breaker. Remove all internal components — blower motor, heating element, thermostat, wiring harness, control board. Take photos of every connection before you disconnect anything. The wiring on heaters isn’t always color-coded, and you don’t want to guess which wire goes where when you reassemble.
Label each wire with masking tape and a marker. Write where it connects. This takes five minutes and saves you an hour of troubleshooting later.
Remove the Old Housing Carefully
Most housings are held in place with screws around the perimeter and sometimes along the bottom. Remove all of them. Some heaters have clips instead of screws — pry them gently with a flat tool. Don’t force anything, or you’ll crack the mounting flange.
Once the screws are out, the housing should lift off or slide forward. If it’s stuck, check for hidden screws or adhesive pads. Some manufacturers glue the housing in place to reduce vibration noise. A putty knife wrapped in cloth can cut through the adhesive without damaging the frame.
Install the New Housing and Reconnect Everything
Position the new housing and hand-tighten all screws. Don’t fully tighten yet — make sure everything lines up first. Check that the blower wheel has clearance to spin freely. Check that the element sits in the right position. Check that the outlet grille aligns with the duct.
Once everything fits, tighten the screws in a cross pattern. This ensures even pressure and prevents warping. Reconnect all the wiring exactly as you labeled it. Double-check every connection before you power up.
What Happens If You Ignore Housing Damage
The heater keeps running. For a while. Then the airflow gets worse, the motor gets louder, the element cycles on and off more often. The housing damage slowly poisons everything inside the unit. By the time you notice a real problem, you’re replacing the motor, the element, and the housing instead of just the housing.
A damaged housing is a slow leak that drains the life out of every component it touches. Fix it early, and you fix one part. Ignore it, and you fix everything.
One Thing People Always Overlook
After replacing the housing, check the alignment of the blower wheel. A new housing that’s even slightly off-center will rub against the blower blades. That rubbing creates vibration, wears down the bearings, and kills the motor in weeks.
Spin the blower by hand after reassembly. It should rotate freely with no contact against the housing. If you feel any drag, adjust the housing position until the clearance is even. This takes two minutes and prevents a motor failure that would cost you ten times more.